
Tree view is one of the building blocks of Resco mobile apps. This special view displays records from multiple entities organized in a tree-like fashion. For example, a list of accounts combined with their contacts.
Requirements
Tree view was introduced in summer 2021 release (14.1). An updated Woodford is required for configuration, and an updated version of Resco mobile apps is required to display it.
Define a tree
Tree views are defined and configured in Woodford.
-
Edit an app project and select Components > Tree from the Project menu.
-
Click New and enter a name for your tree, then click OK.
-
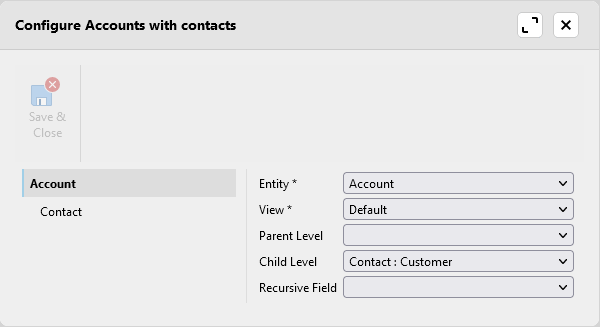
Select the parent Entity, such as Account, and choose which View should be used to display its records.
Even if you have multiple row designs configured using the Next Wide parameter, the tree view ignores the settings and uses the default row style. -
Add another level to your tree. Do one of the following:
-
If you want to add a child entity, select a child relationship in the Child Level field.
-
If you want to add a parent entity, select a parent relationship in the Parent Level field.
-
If you want to add the same entity as parent or child, select the relationship in the Recursive Field field.
-
-
Select the newly added entity and choose the appropriate view for it.
-
Add more entities as needed, then click Save & Close.
Add tree to home
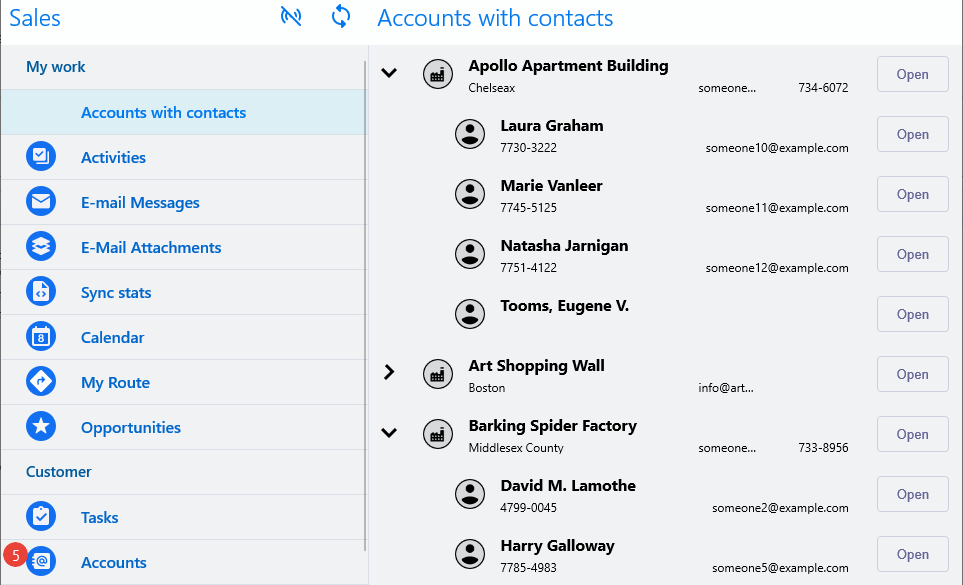
You can define as many trees as you need, but before you can use them in the mobile app, you have to add them as an item to the home screen.
-
Edit the home screen of your app project.
-
Find your tree view on the Available Items pane in the Components section and add it to your home screen.
-
Save changes and publish the app project.
Synchronize your app to see the new tree view.
Add tree to form
Since release 14.3, it is possible to add tree views to forms.
-
Edit an entity form.
-
From the Tabs pane, drag Tree View to the Designer pane.
-
Save changes and publish the project.
Tip: add filter to match the behavior of associated lists
When you add an associated list to a form, for example, a list of orders to a contact form, you will automatically see orders related to the contact. This kind of implicit filtering is not available for trees. However, you can set up the filter manually. In this example, we're using orders and contacts.
-
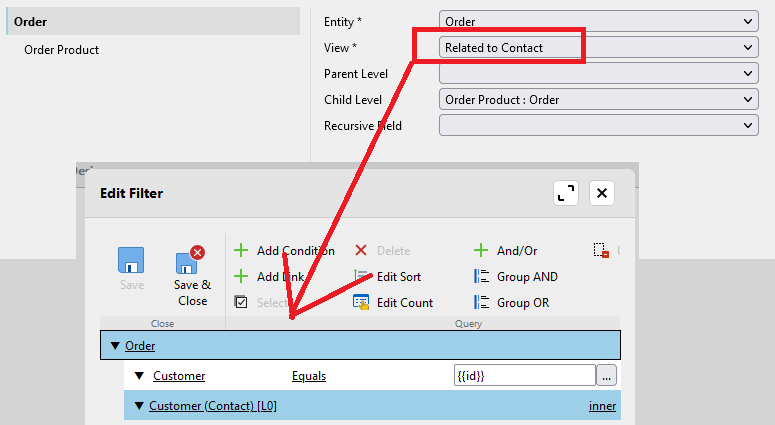
Create a new view (type: "associated list") for the order entity (maybe clone the default view). Add a filter with a link to the contact.
-
Create a tree view for orders and order products that uses the new view for orders.
-
Add the tree to your contact form.
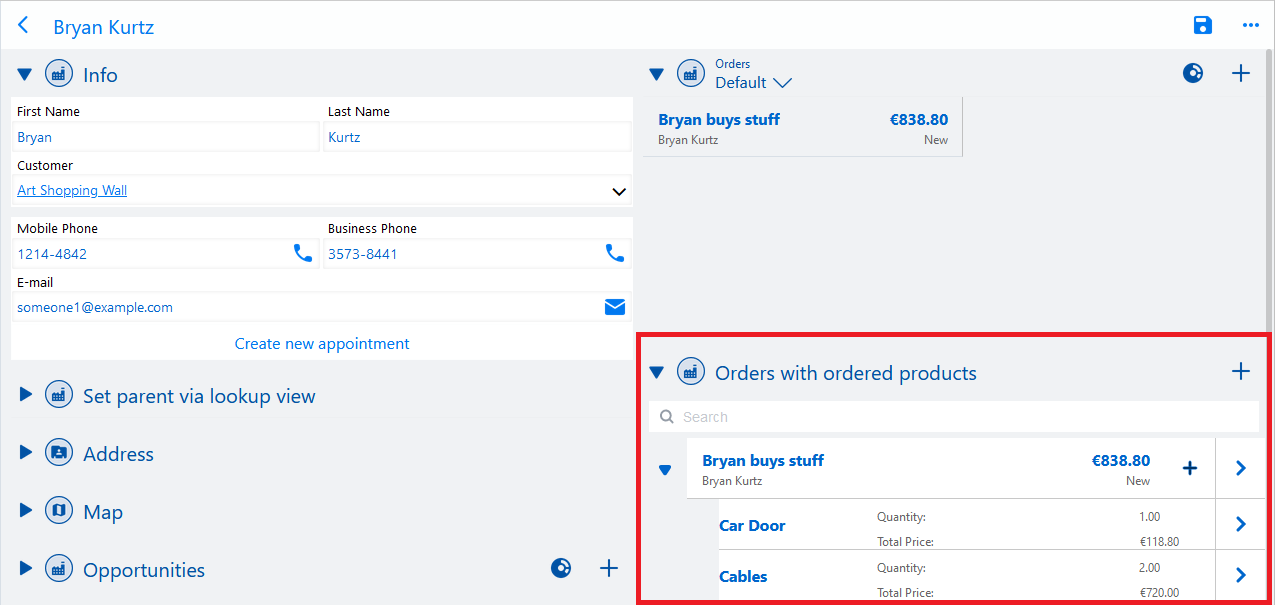
In the screenshot below, you can compare the associated list of orders with the tree listing.
Search within the tree
In releases 19.1.x and earlier, the tree view search always looked at the primary field of a view with the “Begins with” operator. With release 19.2, the standard search configuration of all used views is taken into account.
Tree view search combines two operations:
-
Local filtering checks records that have already been loaded.
-
Server search retrieves matching records that have not been loaded yet.
After you stop typing, local filtering is applied after a short delay. To start the server search, tap Search all or press Enter.
Leading and trailing spaces are ignored.
Configure searchable fields
Searchable fields are configured separately for the view assigned to each tree level.
-
In the App Configurator, edit the view used by a tree level.
-
Open Configure Search Fields.
-
Add the fields that should be searchable.
-
Select a matching method for each field:
-
Begins With: the field value must start with the search term.
-
Contains: the search term can appear anywhere in the field value.
-
Ends With: the field value must end with the search term.
-
Equals: the complete field value must match the search term.
-
-
Save the view and publish the app project.
Repeat these steps for each view used by the tree. For example, the root level can search account names while a child level searches contact names, email addresses, or phone numbers.
Tree view automatically loads the configured search fields even when they are not displayed in the row template.
If a view has no configured search fields, local filtering uses the entity's primary name and matches the search term anywhere in the name.
Local filtering
Local filtering is applied immediately to records that are already available in the tree.
Each record is evaluated using the search fields configured for the view assigned to its tree level. Parent records remain visible when they contain a matching descendant, so the hierarchy leading to the result is preserved.
Changing or clearing the search text updates the visible records without reloading the tree.
Server search
Server search finds matching child records that have not been loaded yet. It searches the configured child levels recursively and loads the parent records required to display each result in its correct position in the tree.
Server search starts when the user presses Enter or taps Search all. If multiple searches are started quickly, only the latest result is applied.
Highlighting matches
Matching text is highlighted in displayed text cells.
A record can be found using a field that is not part of the row template. In this case, the record is shown, but no text is highlighted because the matching field is not visible.
Only the first occurrence of the search term in each displayed text value is highlighted. Highlighting is case-insensitive and follows the current locale.